


Raphia With Slats, Wire, Etc. Part 3
Description
This section is from the book "Raphia And Reed Weaving", by Elizabeth Sanborn Knapp. Also available from Amazon: Raphia and Reed Weaving.
Raphia With Slats, Wire, Etc. Part 3
Cuff And Collar Box
Material. - Pith, one-quarter inch wide, and raphia. Dampen the pith, and form a circle five inches in diameter, from one end. The pith is now wound in a spiral, to form the sides of the box, which should be about five inches in height. The raphia is used for joining the pith, as shown in the illustration. It must be damp, and used with a coarse needle. The bottom of the box may be made of circles of thin wood, or of heavy cardboard, and in either case holes are bored near the edge of the circle, and this is sewed into the edge of the box.
For the edge of the cover, join, separately, two circles of pith, as in the sides of the box, and for the top of the cover use a circle of cardboard, covered with raphia. To cover this, cut a hole in the center, and work in buttonhole stitch around the outer edge, passing the thread through the hole in the center.
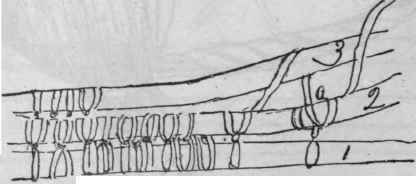
Detail of join of 2d and 3d rows.
Join this covered piece to the edge of the cover, by sewing through the ridge formed by the buttonhole stitch. The bottom of the box will present a neater appearance if it is covered in the same manner. A ring is placed on the top of the cover. This is formed of tightly braided raphia, or by covering a small brass curtain ring with a buttonhole stitch, as in napkin ring.
After passing once around with the raphia, the thread is brought up between 2 and 3, over 3, and then down in front of 2, and between the looped stitches; it is then brought out between 2 and 3, and back over at A, forming a knot, and so on. This makes a very durable and effective join.
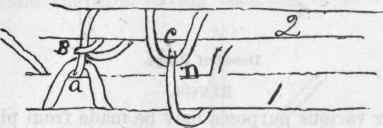
Detail of join of first two rows of side of Cuff Box.
Pass the raphia, with a buttonhole loop, over strip No. 1. Bring the end of the thread through this loop, and over strip
No. 2, then down behind No. 2, and back over the thread at B. Then carry it back of No. 2, and up over it, and here form another buttonhole stitch. Bring the end around No. 1, at D, and here form another loop, and proceed. It will be noticed that the loops alternate on either side.
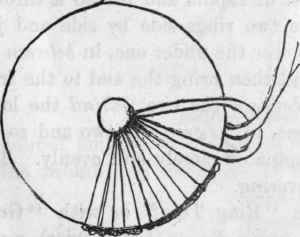
Detail of Top of Cover for Cuff Box.
Frame
From a square of cardboard cut a circular frame, using five and one-half inches for outside diameter and two inches for inside. Cover this with raphia, using the buttonhole stitch as in detail for cover of cuff and collar box. After the open framework is covered glue another circular piece to the back. Use braided raphia cord for hanging, or make an easel back.
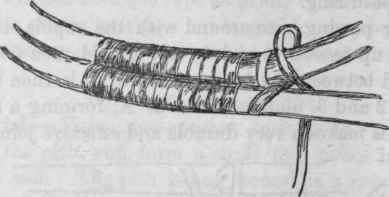
Detail of Rings.
Rings
Rings for various purposes may be made from pith, round or split reed. For napkin rings use the split reed (No. 8), or pith (No. 5). Make two rings of the same size and join the ends of each by lapping and wiring. The ends should be trimmed down with a sharp knife so that the join will be smooth. Now wet a strand of raphia and thread it through a coarse needle. Hold the two rings side by side and join them by passing the raphia over the under one, in between the two, under the top one, and then bring the end to the front and over the top one, in between the two, behind the lower one, back again to the front, in between the two and so on, being careful to lay the raphia on closely and evenly. This will make a very smooth covering.
Larger rings for use in "Ring Toss" or with "Grace hoops" may be made by using No. 8 (or heavier) round reed. Form into rings by splicing and wiring with fine wire.

They are covered with raphia in the same manner, but the appearance is made more pleasing to the child by coloring the raphia before using. This may easily be done by using "Diamond Dyes."
Raphia, With Wire
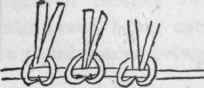
By using wire as a foundation, over which the raphia is woven, many artistic articles may be made. Copper wire, being very pliable, is often used when the pupils are too young to manipulate the heavier iron wire. In size it should not be too fine, that of the lead in an ordinary sized lead pencil being about right. The flat mat is chosen for the first lesson, and the wire, having been cut to an even number of desired lengths, is crossed at the center, and held between the thumb and forefinger of the left hand, while with the right hand, the strand of raphia is carried under one ray, brought up and carried back over the top of the same, and then across from the under side to the next spoke, as shown in the detail. This throws the covered wire up on top, in the form of a ridge. When finished, the ends of the wire are bent over the mat, to prevent the raphia from slipping off. A fringe is added by looping doubled strands of raphia into the edge. Either side may be used for the top.

Detail of Raphia and Wire Mat.
With Wire Hairpins
By using heavy wire hairpins, substantial foundations for many pieces of dolls' furniture may be made. The hairpins are firmer than the copper wire, and may easily be cut by using a pair of wire cutters, and bent into any desired shape with a pair of flat pliers.
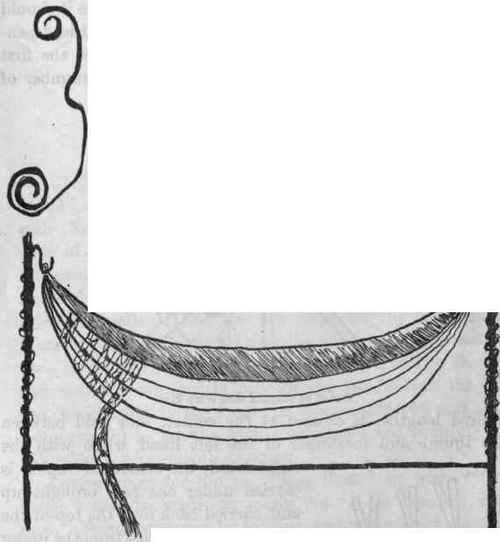

Details I. and II. Detail III.
The different parts of the framework should be joined firmly by using fine wire, and after the foundation is secured it may be painted or not. If the entire framework is not painted, it will be necessary to wind, with raphia, the parts not covered by the weaving.
Tables (oblong, square or circular), chairs, of all styles, hanging baskets, basinets, etc., etc., may very easily be made.
Basinet
In making the basinet, bend the hairpins for the ends, as in Detail I., using two hairpins for each end piece. After bending to desired shape, wire these pieces together with fine wire, and then wind with raphia.
Detail II. In order to strengthen the framework, a cross-piece is placed at the bottom, as seen in the drawing, and the ends are brought up to near the top of the uprights, and here bent down, so as to form a hook, on which the basket is hung.
Detail III. The framework for the basket is formed by using copper wire, and then covered with strands of braided raphia.
Continue to:


My Books

