


Paint. Part 3
Description
This section is from the book "Arts And Crafts In The Elementary School", by Joan Dean. Also available from Amazon: Arts And Crafts In The Elementary School.
Paint. Part 3
Most kinds of pattern offer good opportunity for experience in handling different media, and further suggestions will be found in the chapter on pattern making and fabric printing.
Work designed to help children handle paint well must, of course, include pictorial work. Some subjects encourage interesting handling of paint, more than others. Scenes which include a certain amount of violence, such as storms, earthquakes, fires and battles, all demand a vigorous handling of paint. Just as the use of dark paper forces children to commit themselves in terms of colour, so a subject which demands conviction in the use of paint, forces them to commit themselves. In any case, most children, particularly boys, enjoy painting pictures of rather violent scenes. I usually start this sort of work with some discussion about what is going to be in the picture, perhaps asking the children to shut their eyes and picture the scene. I try to lay particular emphasis on the vigour and violence of everything in the picture, so that the children are feeling this before they begin. Then we start straight away in paint, preferably on dark paper. I encourage them, in starting, to paint the biggest things first—the sky, the sea, grass, background. If they start with people, or small things, they have to paint carefully round them. Starting with the background, they can put people in over the top. I try to persuade them to create paint textures by mixing colours on the paper, in, for example, the sky or the sea. We discuss individually the sorts of movements which will make the right sort of brush strokes for the sea or for grass and we connect this with other painting and movement work.

Finger painting. (Chapter 5)

9-year-old. Pattern based on different kinds of movement. A firm strong movement was needed for the straight lines and a lighter smoother movement for the curves (Chapter 5)

10-year-old. Painting based on a repeated movement. The movement consisted of a number of straight direct movements, followed by sweeping curves (Chapter 5)

Student's work. Paint texture experiments
This pattern was made by arranging cut paper shapes over a textured background. The background was made by scribbling with a candle and painting over it, then dabbing with rolled-up material. The lines were made with string dipped in paint (Chapter 5)
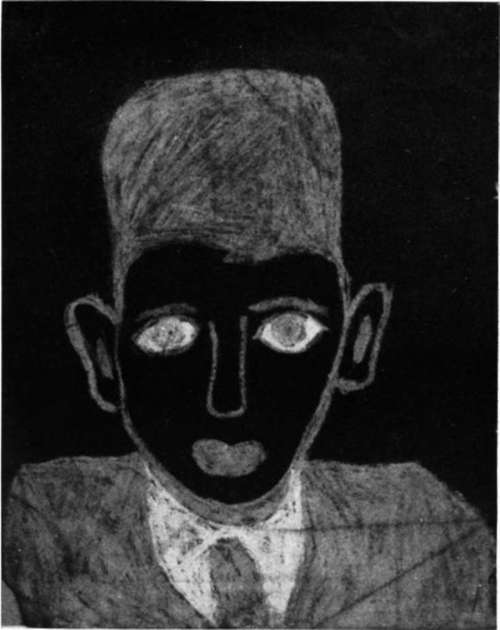
10-year-old. Portrait in chalk on dark paper (Chapter 6)

6-year-old. Exploring the use of crayon
(Chapter 6)

10-year-old. Pattern using several media—pastel, pen and ink, brush and ink, and biro (Chapter 6).
Successful use of paint, in addition to needing experience in controlling it, requires experience and experiment in the use of colour. Children need little encouragement to explore colour, once they have agreed with the idea that only lazy people use the paint straight out of the tin. This natural interest in colour mixing, however, can be further encouraged through definite work. It is best if children are not given too many colours to work with. It is better to have a limited palette and to know it well. If colours like green are not given to children, they are forced by this circumstance to mix colour. I would suggest the following colours as a suitable provision: black, white, crimson, vermilion or scarlet, yellow ochre, chrome yellow, ultramarine or cobalt blue, and turquoise. It is perhaps a good idea to have one or two tins of lemon yellow and indian red, which are difficult colours to mix. White should be ordered in at least three times the quantity of any other colour, for adding white paint, not water, is the right way to make powder colour paler. These paints need containers of some kind so that every child has easy access to the full range. Each child will also need palettes for mixing. These need to have wells of a good size so that enough paint can be mixed to cover a large area, when this is needed.
Colour experiments are best conducted at first with abstract pictures and patterns, where realism does not intrude. Get every child to choose red, yellow or blue, and suggest that a pattern is made using the chosen colour mixed with a bit of something else, for every part of the pattern. Ask for suggestions about the colours you could mix with each chosen colour and suggest that everyone sees how many colours he can make. This work usually results in some lovely colour schemes and a great enthusiasm for colour mixing. There should be a follow-up discussion, in which some children explain how they made some of the colours diey used, and in wlxich children try to decide which colours were used to make some particular colour. In this way, we begin to train children in the ability to analyse the colours they see, into the colours from which they may be mixed. Similar work to this can be done with pictures. Here it is better if subjects are chosen which either suggest a picture based on one colour—"The fire", for example —or are purely imaginary such as "The never never land", "Under the sea", "Scene on Mars", and so on. Another way of making sure that colour schemes are not limited by conventional ideas about colour is to ask for a picture in which nothing is painted in its right colour. It is important to give children the idea at an early stage that when you paint a picture or design, you are "the boss". YOU decide where things are to go and what colour they shall be. They are not predetermined by some set conventional idea. The actual appearance of things is only something to start you thinking. The only question that really matters is "Does it look right?" If it doesn't, don't put it there. In any case, so far as colour is concerned, conventional ideas about colour bear little relationship to reality. Flesh is a sort of pinky yellow, for example, in some lights. Looked at in deep shadow it may be almost black. The flesh under the chin of a girl wearing a bright red jumper will be quite red from the reflected light. In none of these cases is flesh anywhere near the conventional pink. Look at a box or other object which is cubic in form. How do you know where the corner comes? There isn't the black line down the edge, that we often see in children's drawings. It changes colour. This box, which seems to be the same colour all over, is actually one colour on one side, another colour on the adjoining side, and yet another colour on top. There is therefore, no reason for insisting, as some children do, that this is a tree trunk, therefore it must be brown. (Have you ever seen a brown tree trunk?) It can be any colour which looks right in the picture.
When I was describing the movement patterns, I suggested that some exploration of paint textures could take place as part of this work. It may also be a good idea to direct some work specifically to the making of such textures. A good way of doing this, is to let each child cover a sheet of paper with a variety of paint textures. The sheet can afterwards be used as a background for collage work, or, if good enough, for work connected with bookcraft, or just as a book jacket. Encourage as many experiments as you can. Here are some suggestions:
1. Make a texture by rubbing parts of the paper with candle grease and then painting over the greased part. The wet paint will crawl away from the grease, leaving a textured surface. This will also happen when a drawing is made with a wax crayon. In this case the line left exposed will be coloured.
2. Apply paint through a piece of netting or lace, or other strongly textured material, or use one of these, saturated in paint, to dab the paper. Some of the texture of the material will come off on the paper. This can also be done with leaves, though it is often more effective when done with dry colour, chalk or charcoal.
3. Use a piece of card, cut to an interesting shape, to mask sections of the paper, and brush over these with a dry brush. It is best to brush away from the mask, gradually lifting the brush. It is also possible to use such masks by stippling round them with a brush, or by spattering paint. Effective spattering can be done with an old toothbrush flicked with a penknife—unfortunately most children of my acquaintance enjoy spattering other things besides their work!
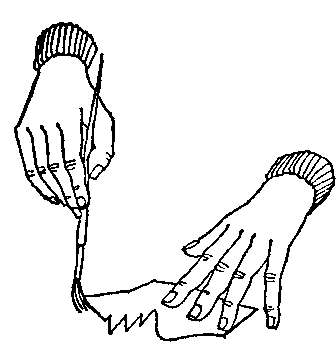
A piece of card cut to an interesting shape can be used as a mask.
4. Textures made with thumb and fingerprints are effective, and textures can be printed with many materials—a piece of twig or corrugated card, for example.
5. A piece of string soaked in paint, stretched over the paper, pulled up and let down on to the paper, makes a textured line. These lines repeated, form stripes.

With all these ways of making textures, children should be encouraged to overlap the marks made and to discover what happens as a result of this. They should also explore the colour possibilities of putting one texture on top of another. Most of the discoveries resulting from this kind of work have more connexion with pattern work than with picture making, and pattern making and possibly fabric printing should follow, so that children may use the knowledge they have gained.
Continue to:


My Books

