


Shooting Technique
Description
This section is from the book "Time Out for Living", by Ernest DeAlton Partridge and Catherine Mooney. Also available from Amazon: Time Out for Living.
Shooting Technique
Shooting a bow and arrow is far more technical than shooting a gun. It requires more than just steadiness of eye and arm. You have to supply the motive power behind the arrow, not merely aim as a rifleman does. Every yard of the arrow's flight is directly the product of the archer's muscular exertion, and its direction depends upon the accuracy of his aim, which he must take at the moment when he is already exerting himself in drawing the bow. Pulling a bow involves steadiness and vitality of the muscles of your shoulders and back, your ability to think clearly and quickly, your skill in being able to relax completely after muscular strain, and control of your nervous system. It requires co-ordination of your entire body. As you realize how much of you is put into the flight of that singing shaft, you will become more and more intrigued with the sport. If you can enjoy each step along the way, the thrill of shooting is never lost. Once you have mastered the technique of target shooting as it is outlined here, you will find no end of sport in the numerous forms which archery takes. Perhaps it will be hunting, clout shooting or flight shooting, novelty shooting, or archery golf. But all forms of archery involve the principles of shooting technique, and it is necessary to master it first.
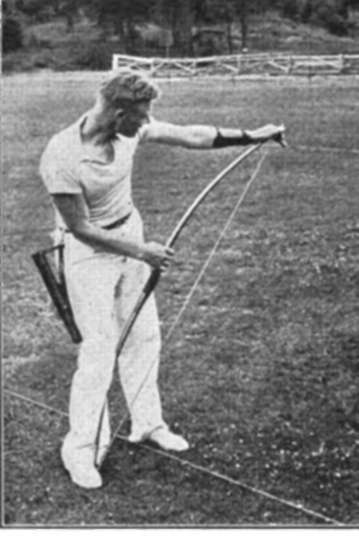
1. Stringing the Bow.*
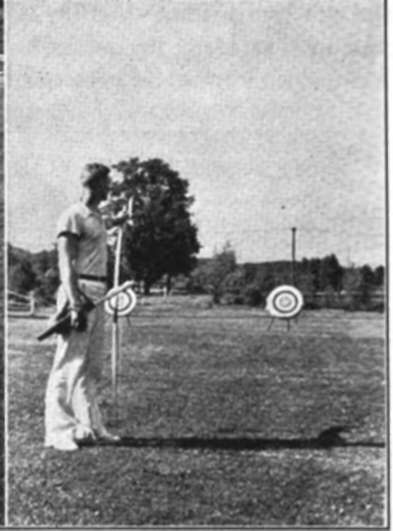
2. Finding the Point of Aim.
Stringing or Bracing the Bow. When you first pick up the bow, you will notice that the string lies limp. This string must be taut before an arrow can be sent from it. In order to string the bow you must follow this procedure: With the back of the bow uppermost, grasp the handle in the left hand. Place the lower limb of the bow, just above the nock, against the inside arch of the left foot (illustration 1). Care should be taken not to push the end of the bow into the ground. Now place the heel of the right hand on the back of the bow just below the loop of the string. By pulling on the handle with the left hand and pressing on the back of the bow with the right, you may bend the bow until you can push the string into the upper end. Do not try to put the string into place before you have bent the bow sufficiently.
* In the following series of pictures Russ Hoogerhyde, five times National Champion, demonstrates how to shoot the bow.
When the bow is braced, the string should be six inches or more distant from the handle. Archers commonly measure this distance by what they call a fistmele, the breadth of a fist with the thumb stuck out. If you find that your string is too close to the bow, you may shorten it by tying a new timber hitch knot on the lower limb or by removing the loop end of the string and twisting it a few turns in the right direction.
Stance
Now, with bow in hand, you may approach the target. If there is a shooting line, straddle it. In archery we do not face the target but stand at right angles to it. Your left side should be turned toward your mark (illustration 2). If you are left-handed, reverse all given directions. Place your feet comfortably apart, with your weight equally distributed on each of them. If your feet are too close together, you will be unsteady. Remember that to keep proper balance in a train or a bus, you do not stand with feet together. If your feet are too far apart, you will tire easily. Take a good, easy posture with your head erect (illustration 3). Now turn your head toward the target; be careful not to turn your shoulder too. Once you have this position, remember to keep it. Mark the position of your toes, if necessary, with golf tees or other similar objects to make certain you stand in the same position each time, for a change of standing position will change the flight of the arrow. If you are indoors, mark your stance with chalk.

3. The Stance. Notice how Mr. Hoogerhyde straddles the line. Note also the front view of a correct stance.
Nocking The Arrow
Take the bow in your left hand near the top of the handle. Place the palm of your hand against the belly of the handle, which is toward you. Allow the bow to rest against the fleshy part of your hand between the thumb and the forefinger and then let the thumb and the fingers encircle the bow lightly and naturally; they should never grip the bow. When you begin to draw back the string, this fleshy part of your hand below the thumb should be pushing naturally against the handle. You are now ready to place the arrow on the string (illustration 4). To do this properly, place the arrow between the first two fingers of your right hand and swing the arrow over on top of the bow, nock the arrow (that is, place the arrow with the string in the groove) so that it is at right angles to the top of the handle. The cock feather should always be pointing away from the bow; it will point up when you are nocking the arrow, to the left when you are drawing the bow. The important thing to remember is that you must always nock your arrow in the same place. Most archers mark the nocking point of the arrow. It is a simple thing to do with a carpenter's square and ink.
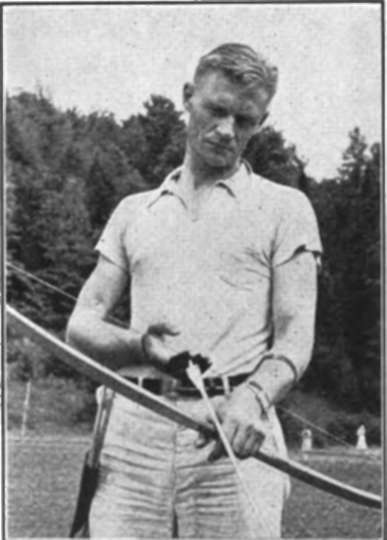
4. NOCKING THE ARROW. The COCK feather points away from the bow.

How to establish the nocking point on the bowstring.
Continue to:


My Books

