


Model XXII. - A Set Of Hat-Pegs
Description
This section is from the book "Manual Instruction: Woodwork. The English Sloyd", by S. Barter. Also available from Amazon: Manual Instruction: Woodwork.
Model XXII. - A Set Of Hat-Pegs
Fig. 256
This model makes a good chamfering exercise.
The drawing should be the front elevation, and the section showing the side view of the peg. The isometric view of the peg is given, however, as it may be of assistance. The length of rail is not given, as this can be left to the teacher to decide, and, of course, the number of the pegs also. Two feet will be a suitable length for the rail, if no pressing reason exists for making it longer.
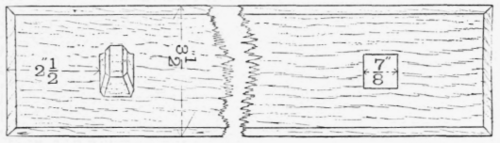
Elevation.
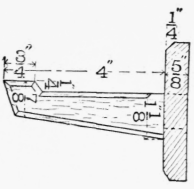
Side elevation.

Fig. 256.
Each peg should be made from a piece of wood 5 ins. long and 1 in. by 1 5/8 in.
Plane up the rail and the wood for the pegs. It will be noticed that the pegs are shouldered on the under sides to keep them stiff under pressure on the extremity of the peg. Mark the shoulder on one end of the peg, and saw out the tenon for the mortice. Apply the end of the peg to the surface of the rail, and mark out the mortices with a chisel point, and make them as usual, boring them out roughly first.
The pegs should first be set out on the sides, and the sloping under side and the depression on the top roughly sawn out. Finish these with a jack and smoothing plane, and pare and plane the sides to make the shape shown in front elevation, fig. 256.
Complete the pegs by chamfering the angles, as in Exercise XX., and glue them into the mortices.
The ends of this rail can be ornamented by screwing on a shield, similar to those in Exercise X., at each end.
Continue to:


My Books

