


Tools. Part 5
Description
This section is from the book "Elements Of Woodwork", by Charles A. King. Also available from Amazon: Elements Of Woodwork.
Tools. Part 5
The above illustrates all the adjusting mechanism; the other parts of the plane are as follows: "handle" (11); "knob" (12); "handle bolt" and "nut" (13); "knob bolt" and "nut" (14); "handle screw" (15); "bot tom," or "stock" (16).
The face, or sole, of the plane (b) must be perfectly straight, or good work cannot be done. The ends of the plane (h and t) are called the "heel" and "toe," respectively. The "mouth" of the plane (between 6 a and 2) must be kept clear of shavings, or it may become clogged.
(E.) In setting a plane, do not pass the fingers over the face, or sole, as cut fingers may result. Hold the plane as shown in Fig. 49, and look toward the light, when the exact projection of the cutter may be seen. Notice the position of the fingers of the left hand, and that the eye glances from toe to heel. This leaves the right hand free to make the adjustments. This is a workmanlike way of setting a plane, and in this, as in all handling of tools, awkwardness should be avoided.
40. Sharpening a plane. (A.) An important part of this process is the grinding of the cutter. Set the cap back about J" from the edge of the iron, and use it as a guide by which to grind the iron perfectly square, as at A, Fig. 50. The cap iron should be kept perfectly square, and never touched except to fit it to the cutter, or, if it is too thick to allow the shavings to pass freely, to file the top of it to the proper thickness. If the tool is kept in order skillfully, the cap will need care only upon rare occasions.

FIG. 49. - Setting a Plane.
The cutter should be held firmly to the grind stone or emery wheel and kept moving from side to side to prevent wearing the stone in one place. The grind ing should all be done upon the beveled side of the cutter, which should be held upon the stone at an angle of about 20° (as at B, Fig. 50), more rather than less, as a thinner edge is apt to "chatter," or vibrate, if it strikes a hard place in the wood. Many workmen use a rest when grinding; this insures a true bevel. Any device which holds the tool firmly at the same place on the stone will do for a rest.
In whetting the cutter, the screw of the cap iron should be loosened and the cap iron carried back until the screw stops at the top of the slot of the bit, as at C, Fig. 50. The screw is then tightened with the fingers to hold the cap in place; this gives a better grasp of the iron, though some workmen prefer to take the cap off entirely while whetting.
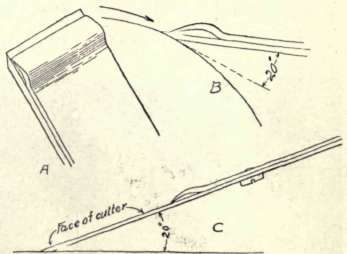
Fig. 50. - Whetting and Grinding of Plane.
The bevel of the iron should be held exactly upon the surface of the oilstone, as shown at C, Fig. 50. the iron being grasped as in Fig. 51. Keep the right wrist rigid and allow the arm to swing from the shoulder, bending only at the elbow. In this way the rocking motion may be reduced to a minimum; this is necessary to preserve the bevel. Though the bevel may be maintained better by imparting a short circular motion to the plane iron, or to any edge tool which is being sharpened, it seems an awk ward and fussy method of work, and rarely is used by an expert workman. By long practice the mechanic finds that a stroke made nearly the entire length of the stone will impart an edge quicker, and after the knack has been acquired, the bevel will be preserved just as well.
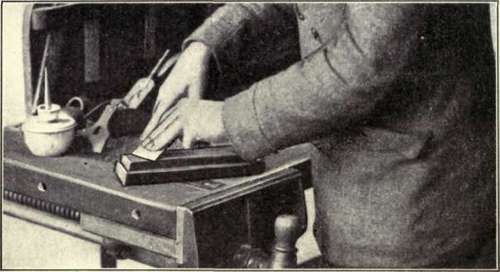
Fig. 51. - Whetting or Oilstoning the Beveled Side of a Cutter.
Turn the whetstone end for end frequently, and work upon the farther end, as in this way the stone may be kept true much longer than if one place upon it is used all the time. This will also minimize the danger of pulling the tool off from the nearer end of the stone, which will generally make regrinding necessary.
When the beveled side has been whetted, lay the face, or the top of the iron, perfectly flat upon the stone, as in Fig. 52, holding it down with the fingers of the left hand, using the right hand only to move the iron back and forth. Care should be used that under no circumstances is the face of the iron lifted the slightest degree from the stone. At this stage of sharpening a plane iron, the utmost care is necessary that the face of the cutter does not lose its perfectly straight surface at the edge, as the slightest deviation from absolute accuracy at this place will prevent the cap iron from fitting properly, which will cause end less trouble, as the shavings will be forced between the cap and the face of the iron (see C. of this topic).
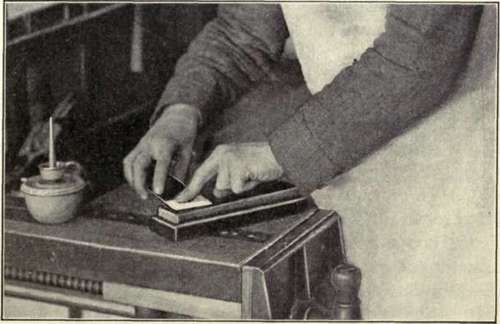
Fig. 52. - Whetting or Oilstoning the Plain Side of the Plane Iron.
(B.) The shape of the cutting edge of the plane cutter has an important influence upon its efficiency. Imagine the edge divided into three equal parts : the middle part should be perfectly straight, or almost im perceptibly rounded; the two outside thirds should be slightly and gradually rounded until the corners of the iron are so short that there will be no danger of their projecting below the face of the plane. This gives the edge an elliptical shape, as shown in Fig. 53, which is somewhat exaggerated, as the shape shown is about that which would be seen if a moderately coarse jack plane were held as in Fig. 49.
(C.) In order to insure fine work, the cap iron must be fitted so carefully to the face and the edge of the cutter that, if necessary, it may be placed less than 1/64th of an inch from the cutting edge, though this would rarely be required except upon very cross-grained wood.
Continue to:


My Books

