


A Scrap-Basket. Part 8
Description
This section is from the book "Design and Construction in Wood", by William Noyes. Also available from Amazon: Design And Construction In Wood.
A Scrap-Basket. Part 8
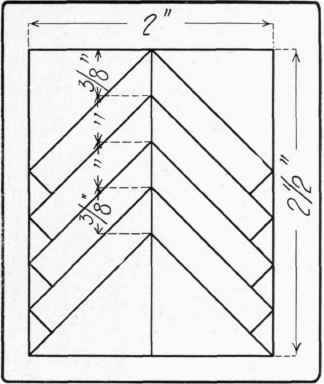
Fig. 43. Lay-out of the tin braces.

Fig. 44. Tin brace.

Fig. 45. Tin brace nailed to cleats.

Fig. 46. Position of slats.
The next step is to nail the slats to the cross-cleats which have already been joined together into a frame.
Measure 1 1/4" from the top end of the four corner slats on the inside. Lay the basket on its side and drive brads from the inside of the basket thru the cross-piece just far enough into the corner slats to hold the frame in place. Later these brads are to be removed. See that the basket stands square in all parts. Now with upholstery nails, nail each slat in its proper place to the frame. These nails should be in two rows, so disposed that the point of each nail is in the vertical center of the slat, and half an inch from one edge of the frame, as shown in Fig. 48.
In order to have something solid to nail against, open the vise wide enough so that the inside of the basket can rest on the outer jaw. Or cut a stick of wood just the length to fit snugly between two opposite cross-cleats, and fit it between them. Or, something heavy like a hammer or a flat iron, may be held inside with one hand, while the other drives the nail. If the point of the upholstery nail projects thru, clinch it; that is, drive it against a piece of iron. Proceed until all the nails are driven.
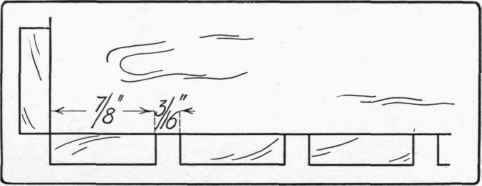
Fig. 47. Arrangement of slats.
X. The feet. The construction of the basket may now be considered done, but it will be improved in looks by the addition of little feet at the four corners, see Figs. 9 and 49. They may be made in this way: From a ⅞" board, 16" long, saw off and plane two pieces to ⅝" thick. In the miter-box cut these into 4 equal rectangular pieces 7" long. From the rectangular end, cut out with the back-saw and trim with the chisel returns as A in Fig. 49. Cut each of these in two in the miter-box at an angle of 45°, making the shape shown in Fig. 49. Holding the piece in the vise for convenience, with the veining tool, or the sharp point of a knife, cut out the decoration and chamfer off the long outer arris. (See Handwork in Wood, p. 184.) These feet may now be nailed in pairs on the corners of the bottom, projecting outside of the slats just the width of the chamfer. See Fig. 7.
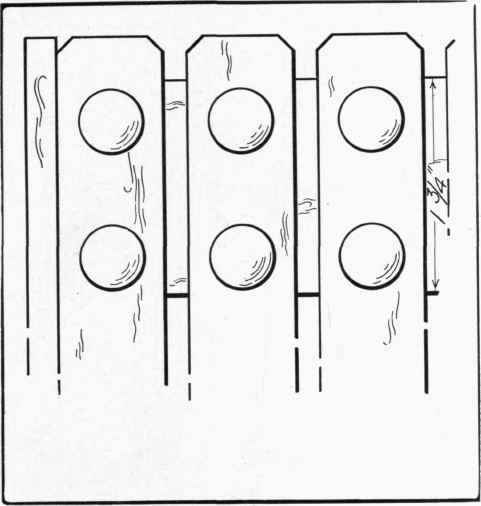
Fig. 48. Arrangement of upholstery nails.
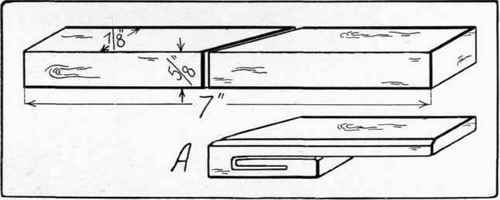
Fig. 49. Feet of scrap-basket.
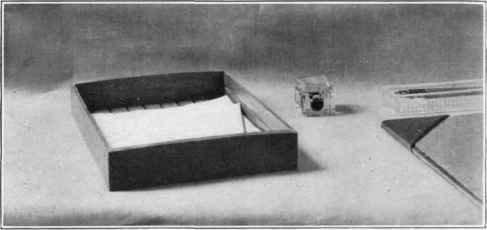
Fig. 50. Letter tray made of slats.
XI. Finishing. The basket is now ready to be stained. First see that all surfaces are smooth and clean and free from pencil marks. Pour a little of the prepared brown stain in a cup, and begin to apply with a brush on the inside of the basket. After staining a portion and before it dries, wipe the stain off with cotton waste (obtainable at a paint store) or with an old cloth. In this way stain and wipe the entire surface. Then let the stain thoroly dry, 24 hours, before waxing with "Old Dutch Finish." If the wax is hard, soften it by placing the can in hot water. Smear it over the surface with a brush, and let it dry over night. Then rub with a piece of soft cloth, cheese cloth, for instance. The more rubbing the better will be the polish. No more wax is needed.
Continue to:


My Books

