


Chapter VI. Boxes And Chests
Description
This section is from the book "It's Fun To Build Things", by W. T. R. Price. Also available from Amazon: It's Fun To Build Things.
Chapter VI. Boxes And Chests
It's a handy thing to know how to make a box for heavy stuff like books, and know that it will get where it's going all in one piece, even when it's been slammed around by movers, and dropped off a truck or two.
One bit of friendly advice: don't make book boxes or boxes for any other kind of heavy contents too large. You are likely to feel that while you are about it you might as well make a good big box. This is no different from making a small one, and easy enough to pack, too, but when the movers try to lift one end, all is not so well. There's no use making boxes so big that when packed they need a derrick to be lifted, or you have to let a contract to safemovers. You will be filled with regrets when it comes to having a few of these mammoth dead weights carried up to a top-floor studio. It will take more in tips than the cost of the boxes.
A handy set of dimensions is 16" deep, 16" wide and 2' 8" (or even 3' 0") long. The 16" dimension is suggested because the height builds evenly from 8" wide boards, which might as well be No. z grade lumber. A few knots won't matter too much in utility packing boxes.
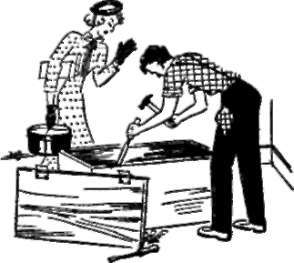
The plan for making these boxes is simple but effective. First cut as many 141/2 lengths of your 8" boards as you will need for ends- two for each end. (A-A, in the sketch.)

Three stages in the making of a simple box for shipping, for instance, books.
Next, cut pairs of cleats, 16" long from x 3" strips, (B-B) as many as you will need. Nailed across the end boards, horizontally, these will leave a 10" vertical space. To fill this, and strengthen the ends, cut pairs of vertical cleats (C-C) from the same lumber (3/4" x 3") to fit exactly between the horizontal cleats. Since it is well to cut these very close, you may have to drive them into position with a hammer. You now have two strong, heavily built ends, which will give you a substantial nailing (as shown) for the side boards. These are cut to length, though it's well not to make these boxes more than 3' 0" long. (It doesn't matter whether you take this as the inside or the outside long dimension of the box.) You will notice in the sketch that by nailing in from both the sides and the ends, you will be making strong corners. 21/2" wire nails may be used for this, as there is no danger of breaking through anywhere, and the main idea of making packing boxes at all is to make them strong. You will have used 1 1/4" wire nails to put the cleats on the ends, as you would not want them to come through the 11/2" represented by the two thicknesses of lumber.
Two boards are now cut to fit the over-all length, and pairing these up for the bottom, they will be found to equal the width of the 14 1/2" ends, plus the thicknesses of two side boards. It is well throughout this whole sequence to try the different parts as in place. Thus, slight variations in the milled thickness of the lumber can be allowed for.
The lid is made the same way, and two cleats are nailed or (in a neat job) screwed on both bottom and lid. The ends of these cleats should be bevelled-either a 1/4" bevel, made with the plane, or a complete 45 degree bevel (see sketch), for which you need a miter box.
You can buy a miter box, or you can very easily make one out of 2/4"x 3"x 3/4" strips. You need only to mark the edges of the miter box with a 45 degree triangle, and carefully cut slots, as marked, to hold your saw in position for making a miter. If you mean to miter moldings in panels, as suggested and shown in a sketch in Chapter XI (Getting Ambitious), you will need a miter box anyway.
It is a mistake to nail the lids on these boxes you will have made, as the ends may become splintered or more or less chewed up when you take the lids off. It is better to use screws, and here you will have a real use for the "countersink" in your brace and bit. By countersinking all the screw holes, the screws can be driven home neatly, flush with the top surface of the lid. If you have many screws to drive in, the screw driver bit that can be had to fit in your brace will save getting a big blister in the palm of your right hand. In reverse action, the same implement will just as easily take the screws out.
It may just be a fussy notion, but the writers of this joyous treatise adhere to the odd idea that it's better to do things the right way than in the futile half-way style practiced by most amateurs. Particularly if a box of books is to be shipped-how much better to make the shipment securely and neatly. It's really worth the slight additional bother.
As for storage chests, in cellar or attic, the same design recommended for the book boxes is best, since the larger the box the more strain there is on it, even in lifting it from one place to another, and, like a shelf, it had better be a little stronger than it needs to be, rather than weaker. For additional strength it is just as well to carry the cleats you nail on the bottom up the sides, nailing their lower ends into the ends of the bottom cleats. This achieves the same purpose as the iron bands that held treasure chests together. If it seems desirable to hinge the lid, long strap hinges will prove the most serviceable, and a finishing touch may be added (at very little extra cost, and vast convenience) by fitting the ends with iron ring handles. (You will appreciate these when you and Cousin Tom come to lift one of your larger storage chests around the attic.)
Continue to:


My Books

