


Printing For Beginners. V. Emptying the Composition Stick and Distribution
Description
This section is from the book "Amateur Work Magazine Vol3". Also available from Amazon: Amateur Work.
Printing For Beginners. V. Emptying the Composition Stick and Distribution
Frederick A. Draper
When the composing stick has been filled it has to be emptied on to a galley. The illustration shows the position of the hands when doing this. The first efforts of the beginner should be made with the stick only partly filled, the full stick being attempted when experience has been gained. Also, in making the first trials, it is advisable to rest the stick upon a galley, as, in case of failure, the type will then be more easily held in place. In removing the type from the stick, the forefingers of each hand press firmly against a lead placed against the outside of the last line of type; the thumbs press against a lead or composing rule outside the first line of type; the two outer joints of the second fingers press against the ends of the lines, thus holding the type on all sides. The other fingers of each hand press against the stick to hold it while the type is removed through the open side of the stick and placed upon a galley.
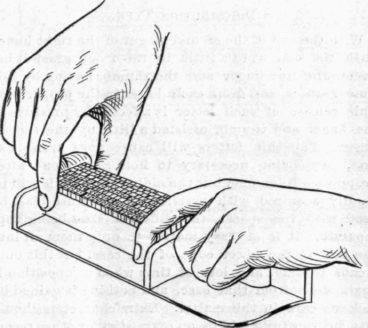
Emptying the Composing Stick.
As soon as the type is free of the stick, bend the wrists to bring the type matter to a vertical position, in which position it is carried to the galley. Care should be taken not to relax the pressure of the fingers at any time while the type is being removed or carried about. With \ery wide measure, the fore-fingers are applied to the type matter at such a distance from the ends of the line, as will give an even pressure to the whole length of lines, and it is frequently necessary to slide the type out of the stick on to a galley, so that, in bringing it to a vertical position for carrying, this may be done with a quick movement, thus preventing the centre of any line from falling out.
When all the type matter is composed and assembled upon the galley, it is tied firmly with strong cotton twine as follows; Beginning at the free corner, wind the twine 10 or 12 times tightly around the type, having the turns overlap each other. A bodkin or the end of the composing rule is put down between the type and the several turns of twine, with the last turn on the inside; the end is then brought back on the outside of the bodkin or rule forming a loop. The bodkin or rule is held at an angle towards the right, and by pulling on the end of the twine the loop will work down the bodkin until it projects on the under side of the turns of twine.
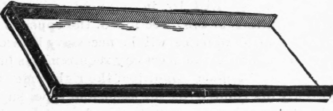
Calley.
Pulling the end of the loop will carry it back against the corner of the type where it will bind. This method of tying is secure, yet allows a quick removal of the twine by simply pulling on the free end. After fastening with the loop as above directed, press the twine down at the corners until about half way between the top and bottom, for, unless this be done, the tension of the twine is sufficient to cause it to slip upwards when moving the type from the galley, and perhaps cause several lines at each end to " pi."
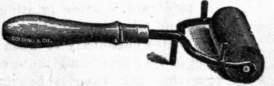
Hand Roller.
It is customary, after tying up the type, to take one or more proofs. If a proof press is available, the type is placed thereon; inked with a hand roller, a piece of paper of suitable size to give ample margins for corrections, is laid upon the type and an impression taken. As many amateurs are not provided with a proof press, the following method will enable good proofs to be secured, if care is used in taking them. Ink is placed upon a slab of marble (tiles about one foot square answer admirable for a small shop), a hand roller is run over it several times to distribute the ink evenly; the type is then inked with a light and even pressure of the roller; the paper is moistened on one side with a fairly moist sponge, the dry side placed upon the type, and firmly and evenly impresed upon the type with a proof-planer, upon the top of which firm, but
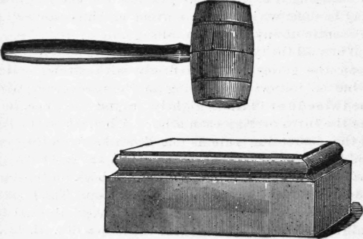
Mallet and Planer.
not very heavy blows are given with a mallet. The paper is then removed by taking hold of one edge or end and pulling in the direction of the opposite edge or end. A little practice will be necessary before this can be well done, the necessary requirements being; a hand roller in good condition, the right amount of ink evenly distributed on the stone and type, paper of good surface and strength and properly moistened.
After taking a proof, the ink remaining upon the type is washed off with benzine applied with a long handled bristle brush. The brush is saturated with the benzine and the type scrubbed until the ink is thoroughly removed. Electrotypes and process cuts are more easily cleaned by using cotton waste, wet with the benzine. It is quite essential to thoroughly clean the type, as if this is not done, the ink will settle around the joints and there harden, giving an uneven surface tothe sides of the type, and causing them to stand unevenly. Justifying the lines and good press-work will thus be made a difficult matter to obtain. After printing large editions, and following continued use of type, it is also customary to wash with a solution of lye, this being more efficient in removing ink than is benzine. It should be a rule rigidly observed that the type be kept as clean as possible. The benzine must be stored in "Safety " cans, this being a regulation of insurance companies, and only a small quantity can be kept on hand. A one quart can is a good size, this quantity costing about ten cents, and lasting for some time in a small shop.
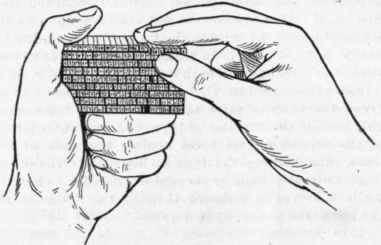
Omitting for the present the locking up the type in the chase and the press-work, and assuming that these have been completed and the type again in the galley, the next operation is that of distributing it into the case. The type is first wet down with water applied with a sponge. This has the effect of holding the type together, and yet allows of easy separation when throwing in. A quantity of type matter equal to about a stickful is taken up, as previously explained for emptying the stick, and supported in the left hand as shown in the illustration. The second, third and little fingers are turned inward forming a support for the type, which is steadied at the back by the forefinger and on the end by the thumb. As with composition, the nicks are uppermost, the letters being read upside down, and the end of the line to the right.

Distribution Type.
With the end of the second finger of the right hand, push the end word a little to the front, grasp it between the fore-finger and the thumb, having by this time read it, and drop each letter in the proper box. This release of each letter is affected by pressure of the finger and thumb, assisted a little by the second finger. The thin letters will cause most trouble at first, care being necessary to hold a thin one after dropping a thick one, but the ability to do this will be readily acquired with practice. Care must also be used wtih the spaces, the different sizes being kept separate. It is an easy matter to drop them all into the box at the lower edge of the case, but this only means trouble, and loss of time when composition is again done from that case, and nothing is gained by lack of care in this matter. Extra characters should also be carefully laid in an extra stick or other receptacle, and thence in the proper case, to avoid possible loss or mislaying them where they cannot readily be found when wanted.
It will be noted, from what has here been said that an orderly method of work and arrangement of materials is absolutely necessary to proper and economical work in a printing office, and the more this idea is followed the better will be the results and greater the profits.
Continue to:


My Books

